No-code Job application scenario

Every company hires new employees; if you’re doing that regularly, it makes sense to automate the most repetitive parts of it. In this post, I describe my no-code job application scenario where I use Make.com scenario builder to accomplish what’s needed without writing a single line of code.
Another important fact is that HR team members are not coders; they often like to change processes. If you develop a dedicated hiring application, every process update will require a developer to modify it. Wouldn’t it be better if any HR team member could update the flow?
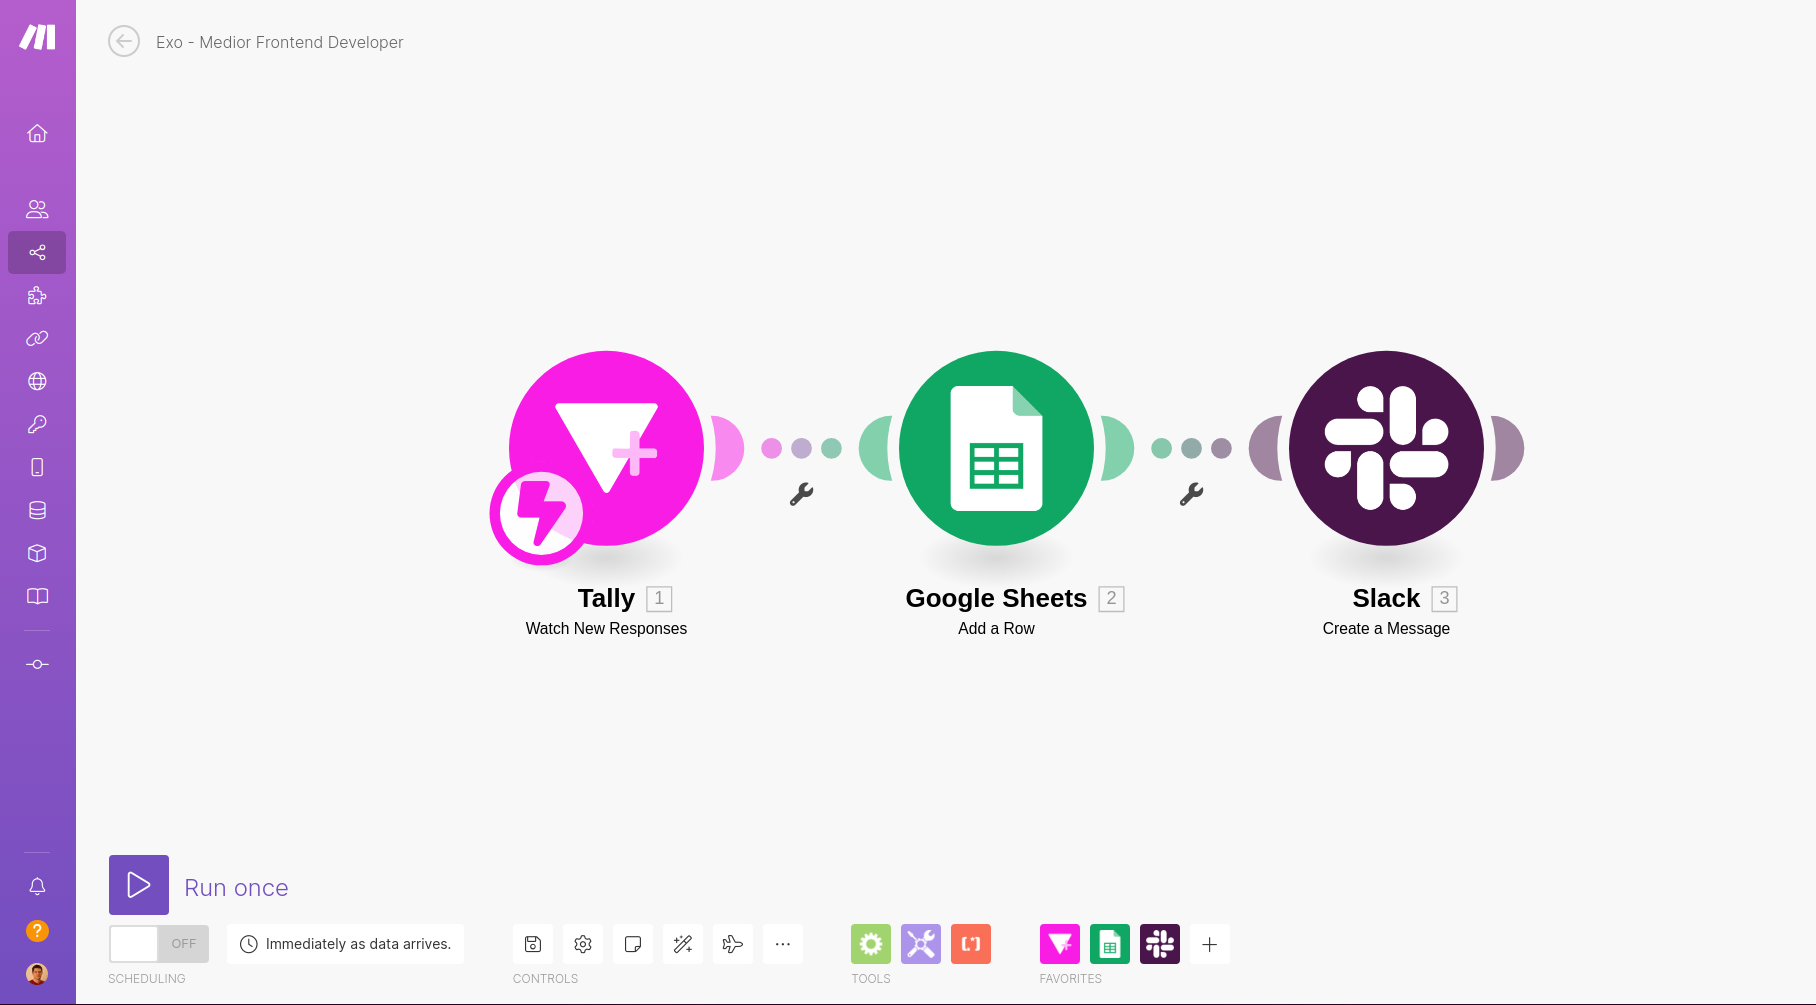
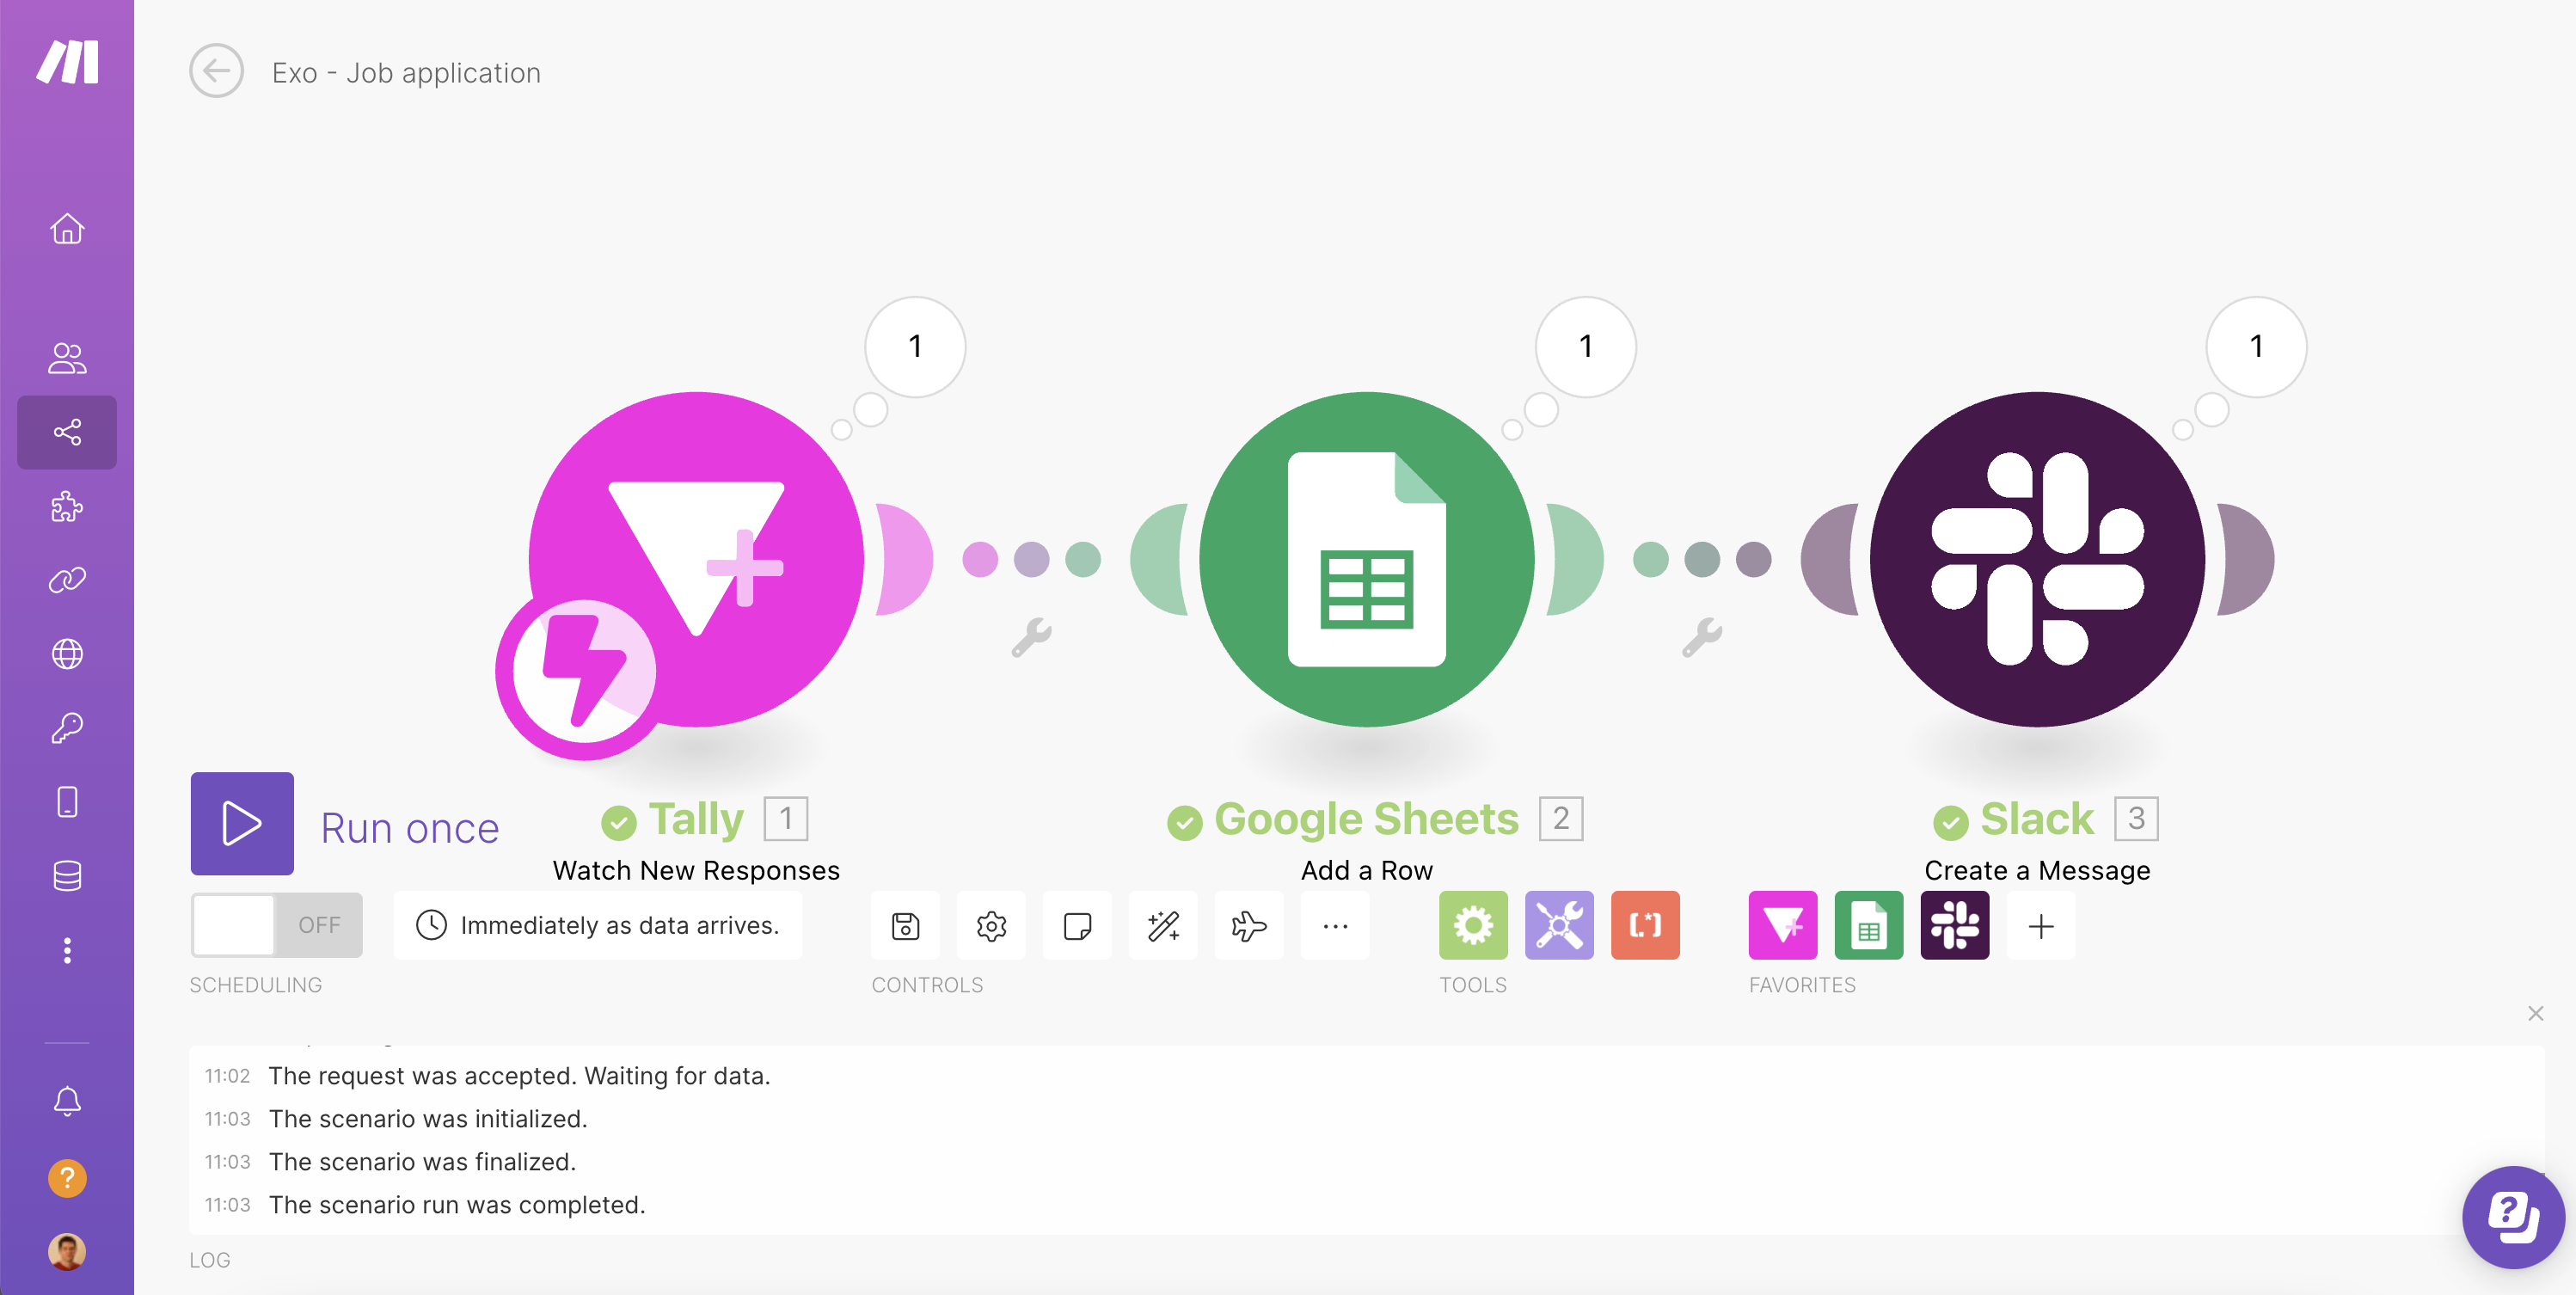
Here I’ll present a basic no-code job application scenario that uses Tally to take input from the applicant, Google Sheets to store entries, and Slack to send internal notifications to the HR team.
Application form – taking input
There are many form-creation tools out there; one that I like is Tally.so. It has a pretty generous free plan, which is just enough for almost every scenario you could think of.
My form will have the following fields:
- First Name
- Last Name
- GitHub Profile
- Attachment
To create a new Tally form, click on Create form button and add these inputs.
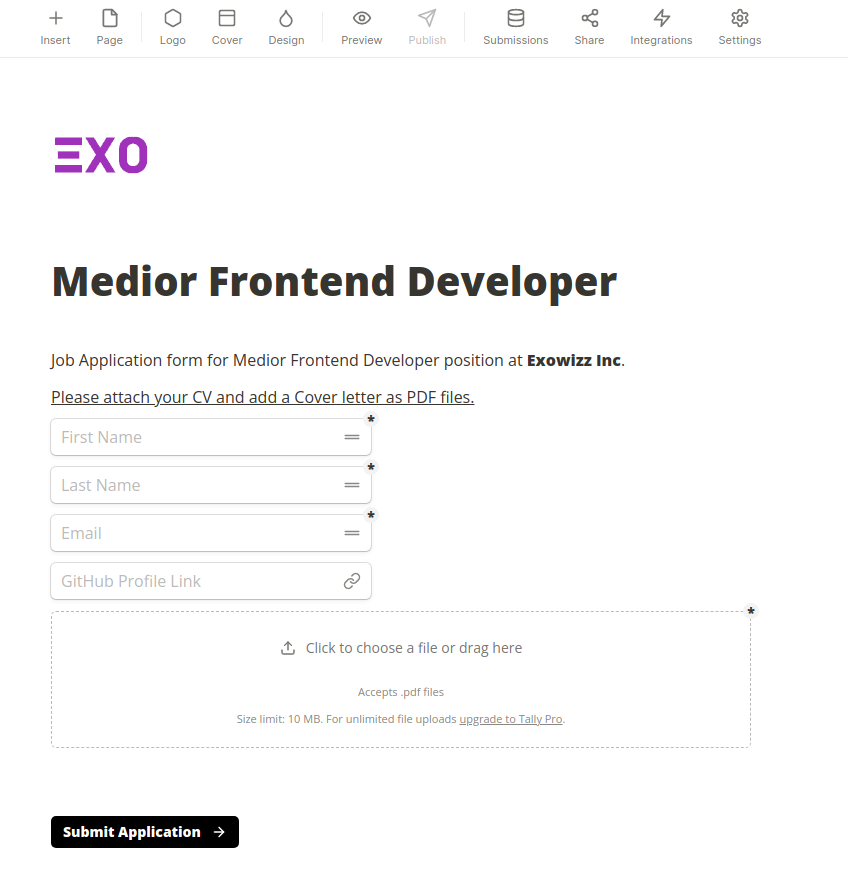
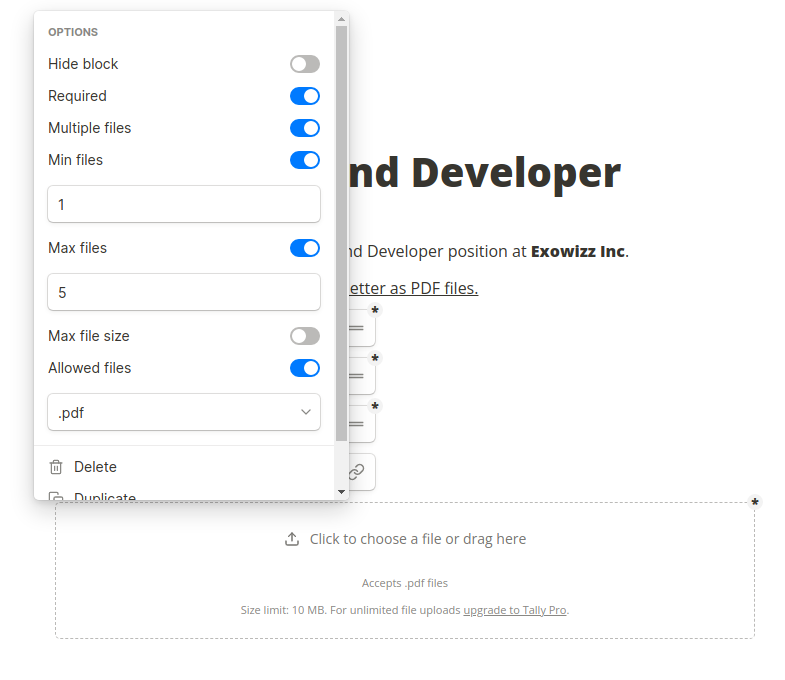
Every input has a few options; I use the required rule for every input except the GitHub profile link.
In the file attachment field, I specified that only PDF files are accepted, an applicant can upload a maximum of 5 files, and at least one file is needed.
You can use my Tally template of this form here Exo – Job application form.
Saving input into Google Sheets
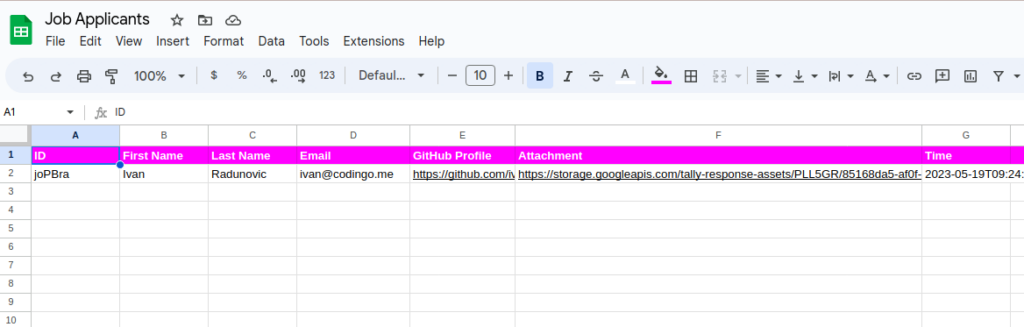
First thing when working with Google Sheets and Make.com is to create a new sheet with the first row containing column names. These column names will be directly pulled into Scenario Builder and used when mapping data.
Besides the fields that I have in the Tally form, I’ll add two more columns:
- ID – unique submission id from Tally
- Time – a time when submission is completed
Scenario Builder
Go into your Make.com account and create a new Scenario.
If you don’t have a Make.com account we are running a special promotion where you’ll get 1 month of Make.com for free with 10.000 operations included. You can claim our offer here.
Exowizz & Make.com
Connecting form submission – Tally Module
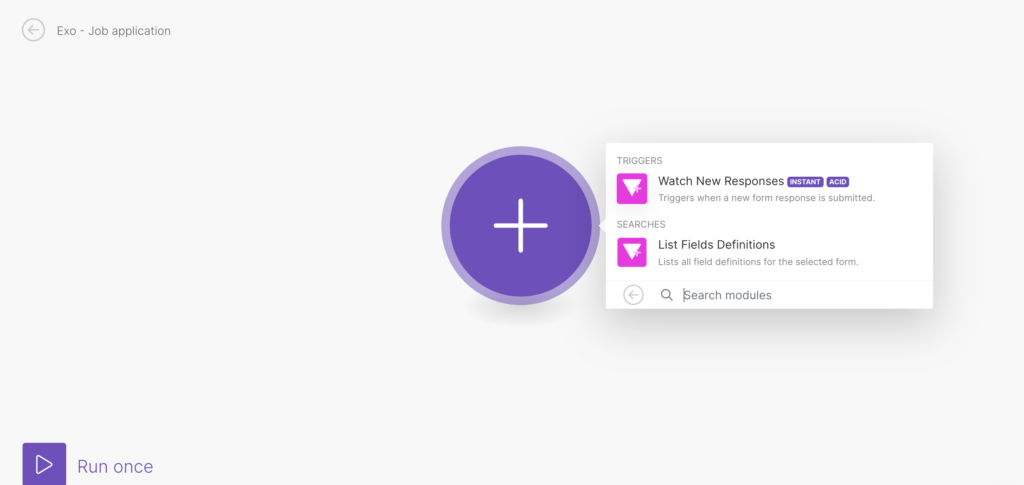
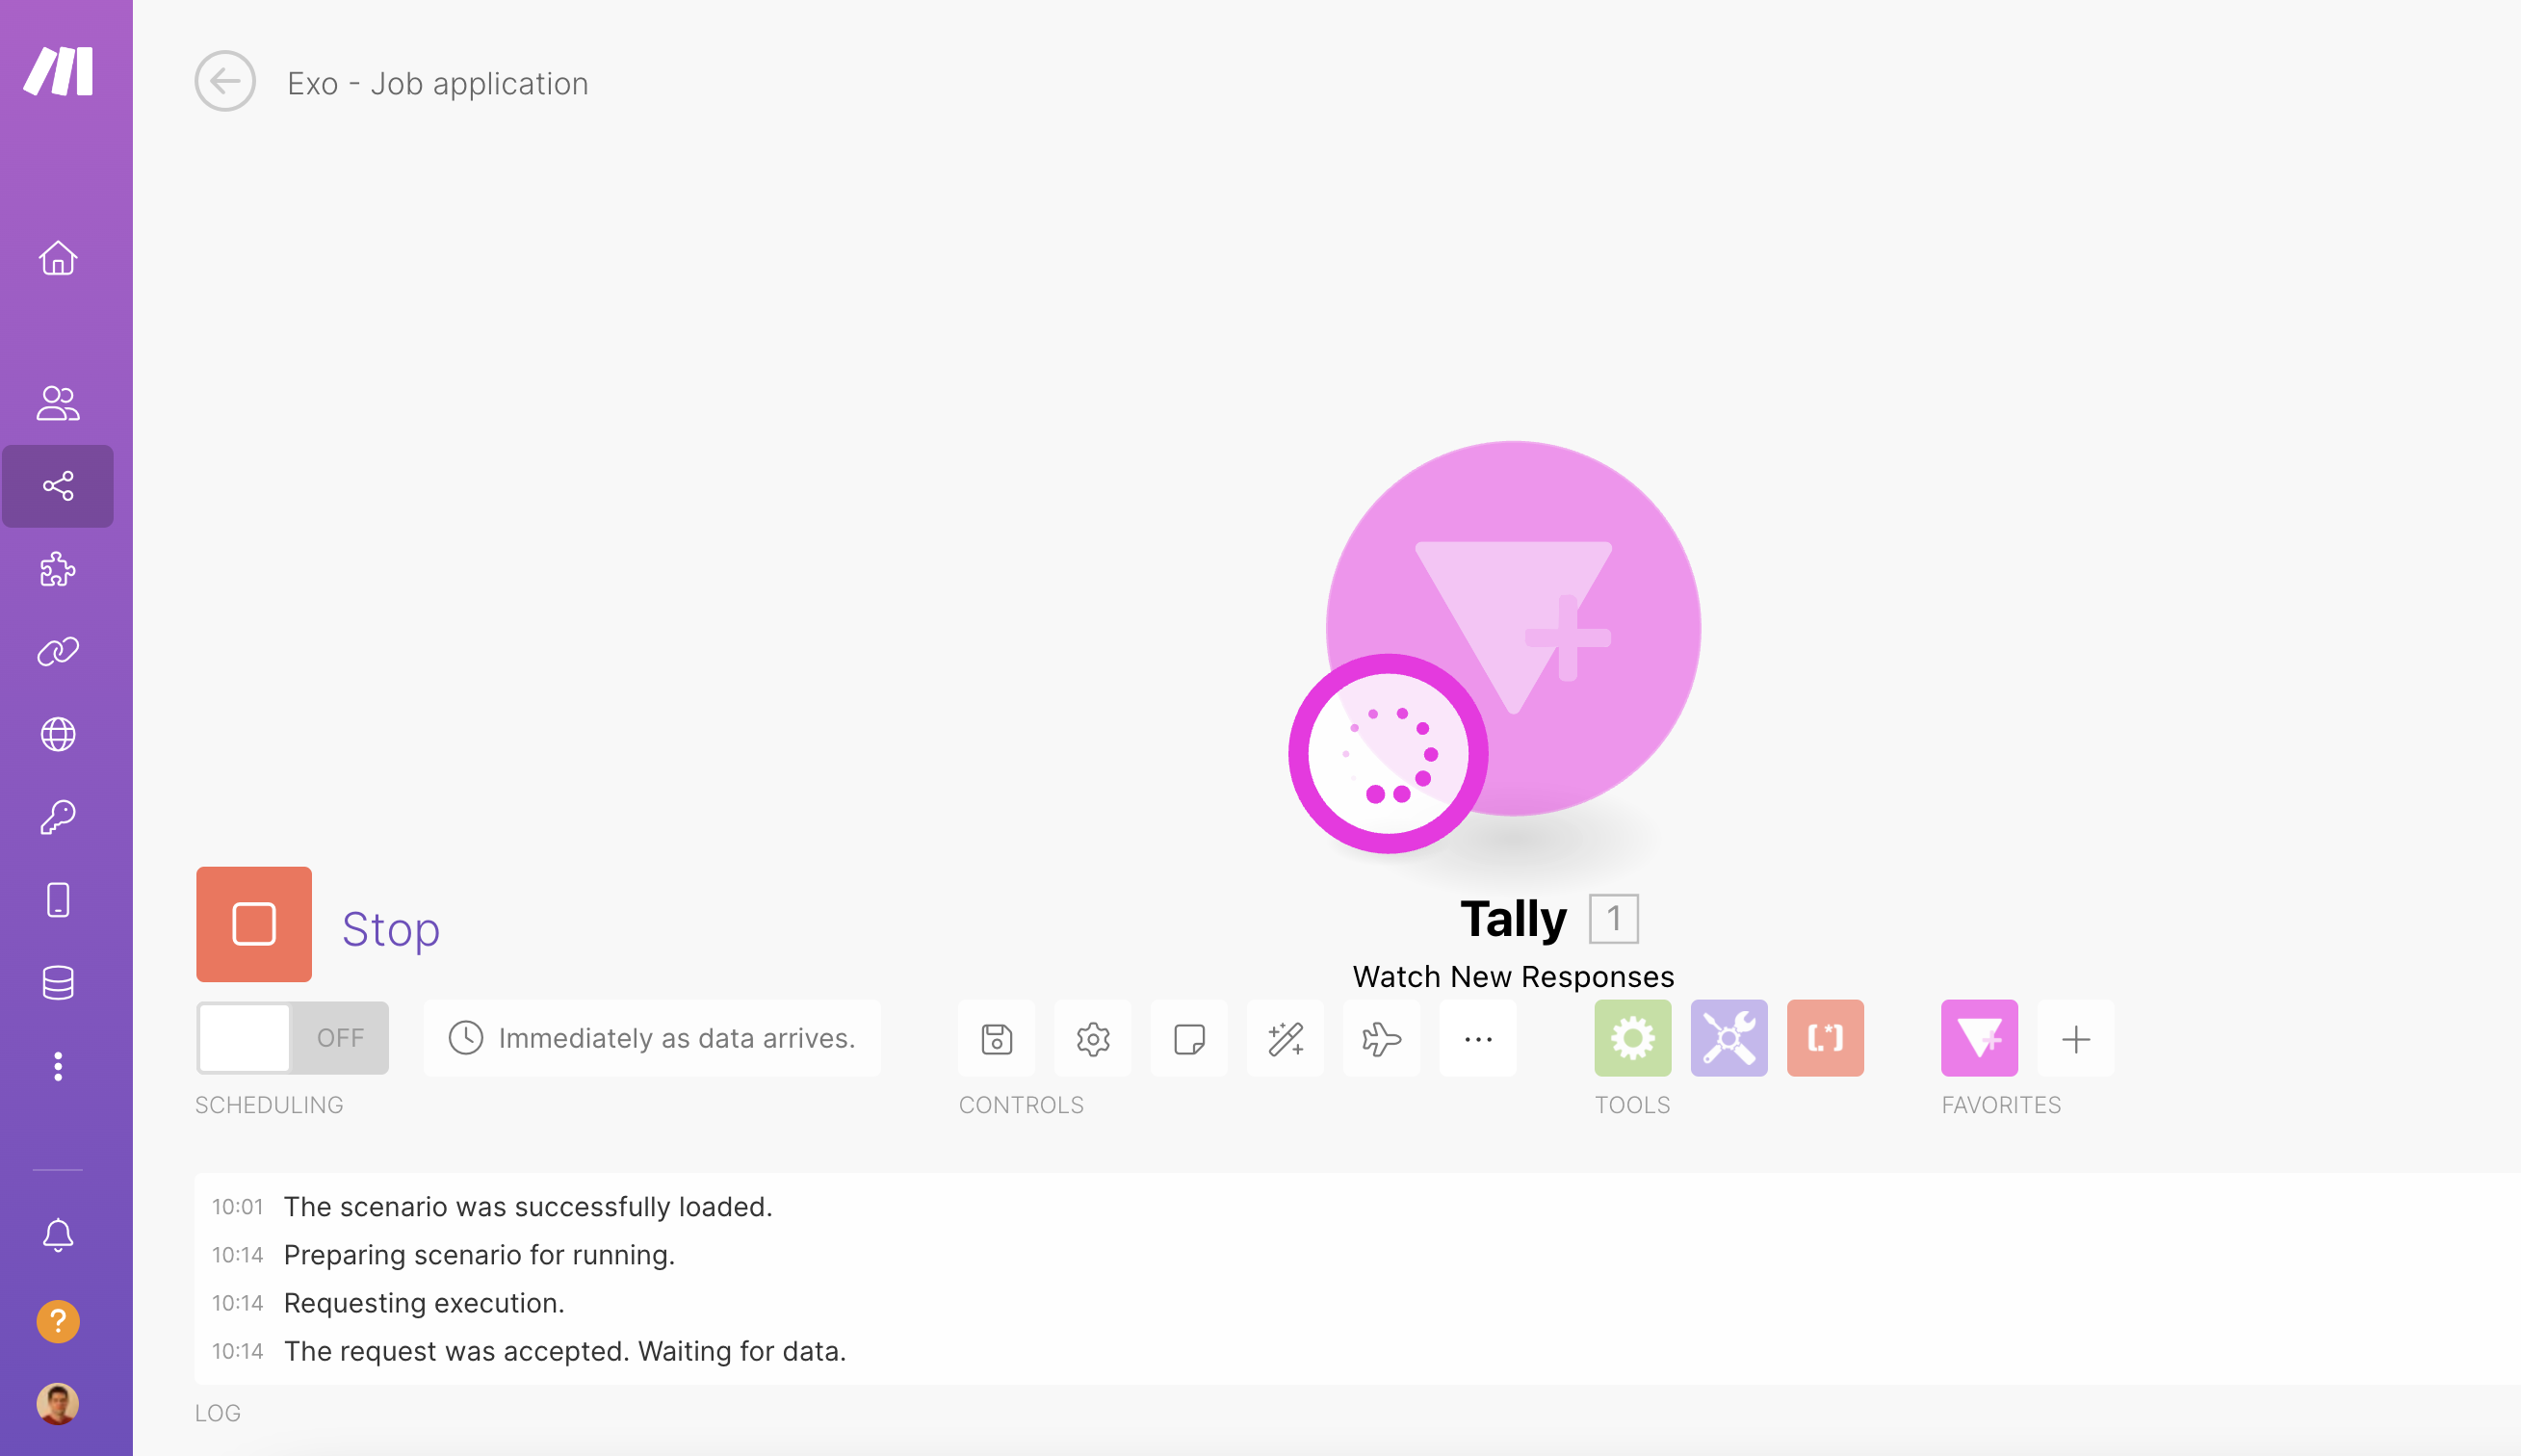
In Scenario Builder, click the + button and search for the Tally application. Inside the Tally Triggers section, choose the Watch New Responses option.
If this is your first time connecting Tally, you’ll need to create a new Webhook and a connection to the service. This logic is the same for any other application on Make.com.
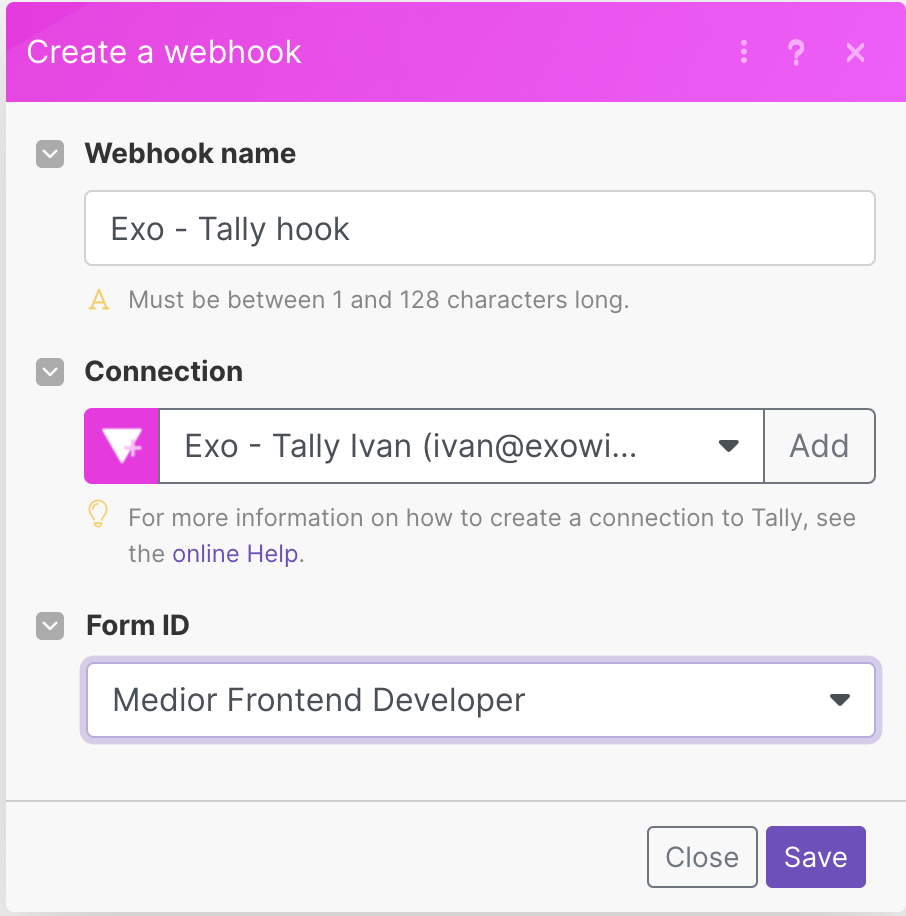
As you can see, you have a Form ID selector after defining a webhook and a connection. From here, I’ll choose my new form, named Medior Frontend Developer.
This is it. I can hit Save.
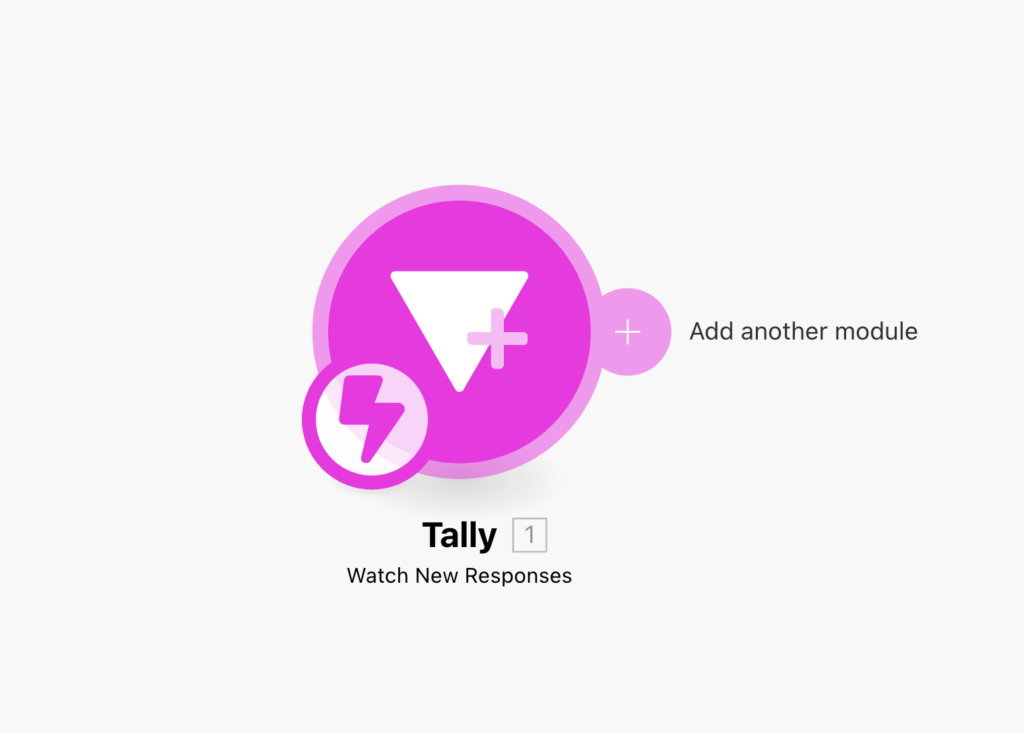
The first module is ready now; I can test it.
Always when testing, use the Run once option from the Scenario Builder toolbar at the bottom.
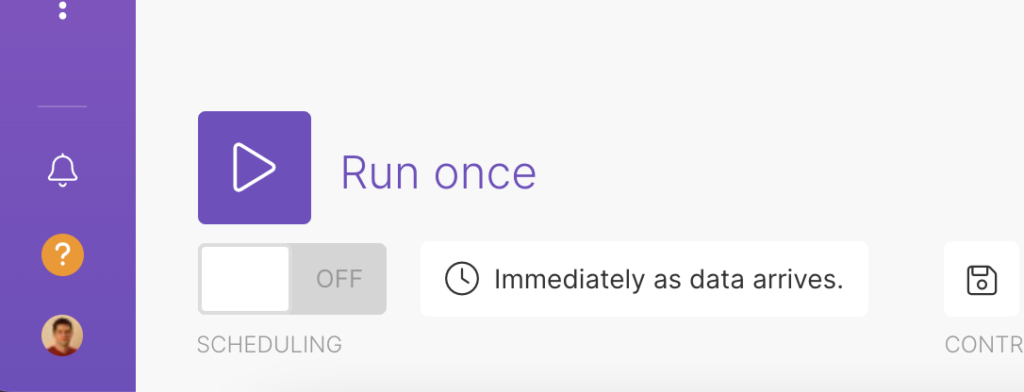
When I click Run once, Make.com will wait for the new bundle from the webhook. To trigger this webhook, I need to fill out my Tally form.
When data is posted to the webhook Make will display number of bundles received.
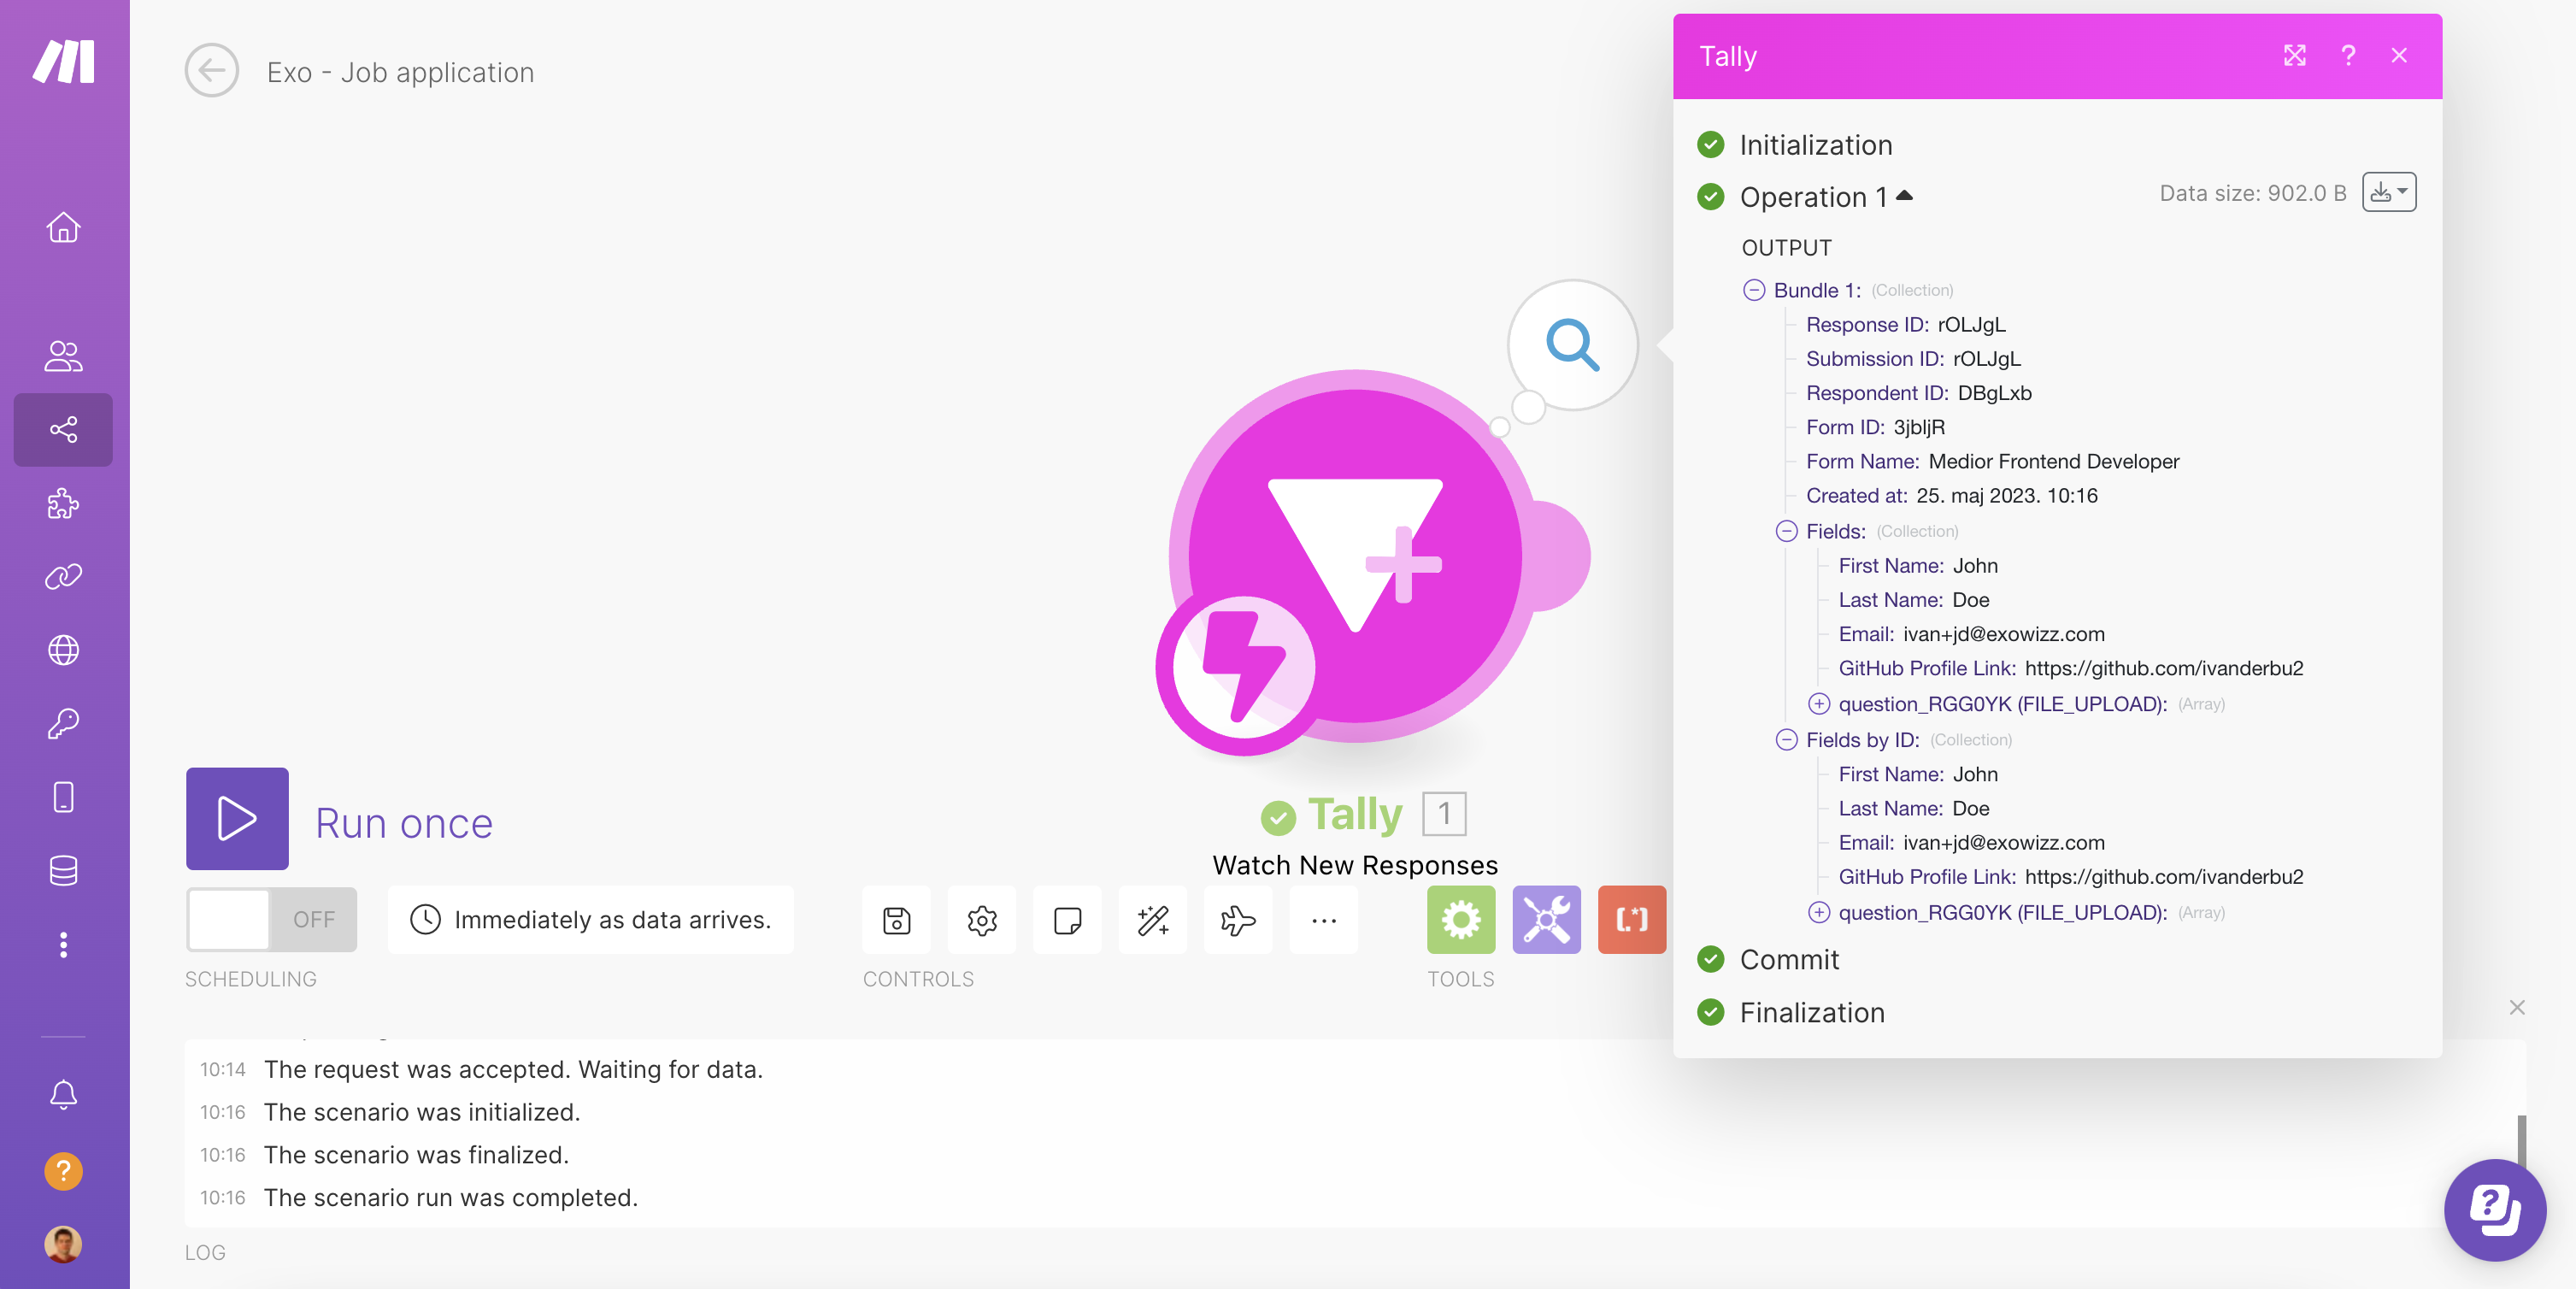
From the modal above, I can see that 1 operation is used, and all the fields are there. This test is successful.
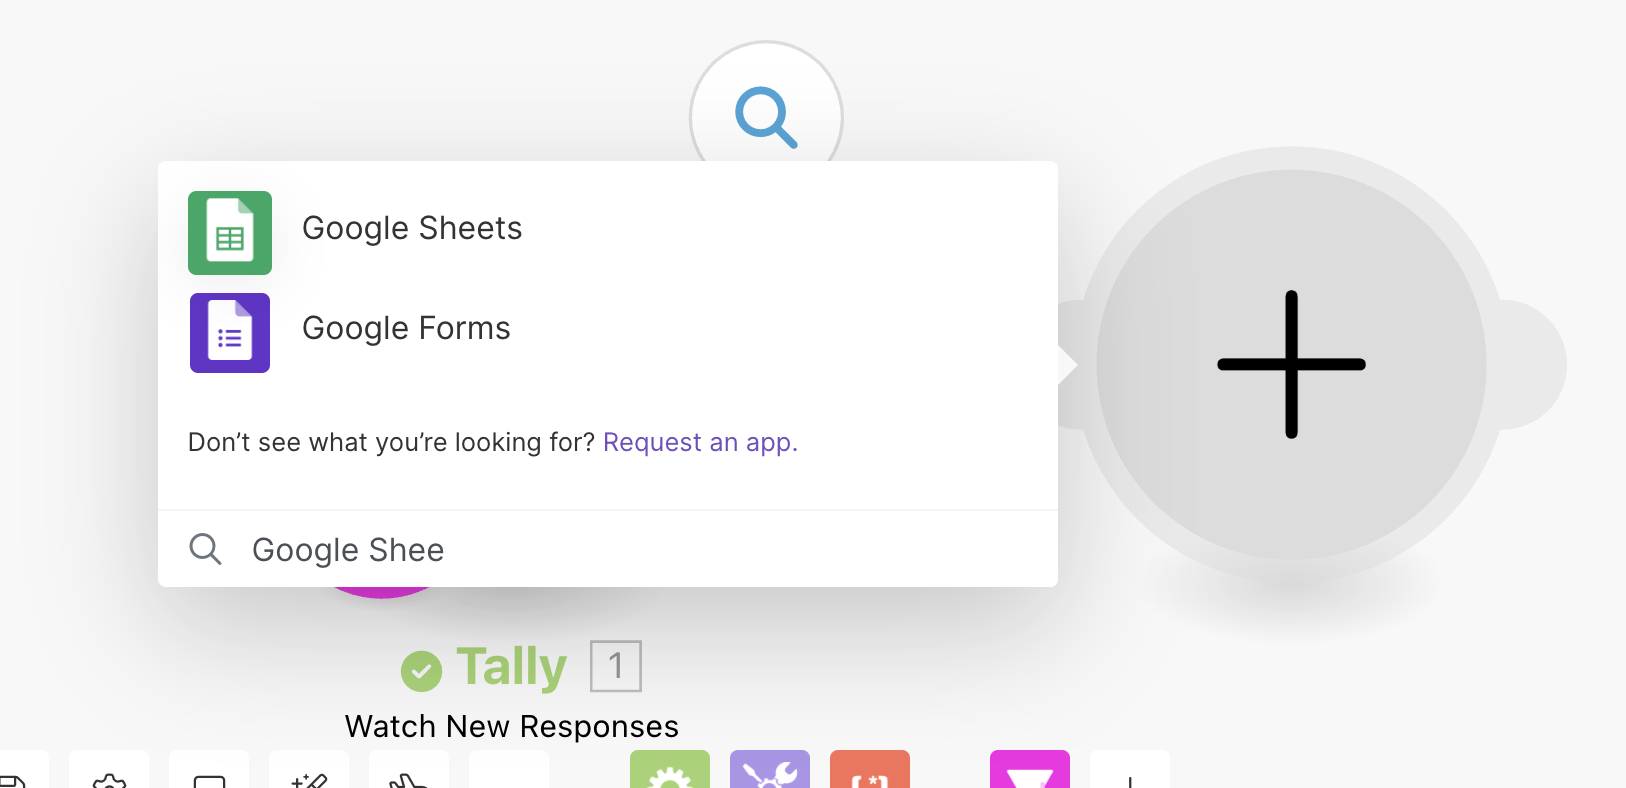
I’ll move to the second module now, Google Sheets.
Saving data to the sheet – Google Sheets Module
The idea is to save the fields passed from the Tally into a new row in the Google Sheet.
There’s a plus button next to the Tally module, and I can add the Google Sheets module using it.
I need Add a new Row module from Google Sheets. That’s the first module in the Google Sheets module list.
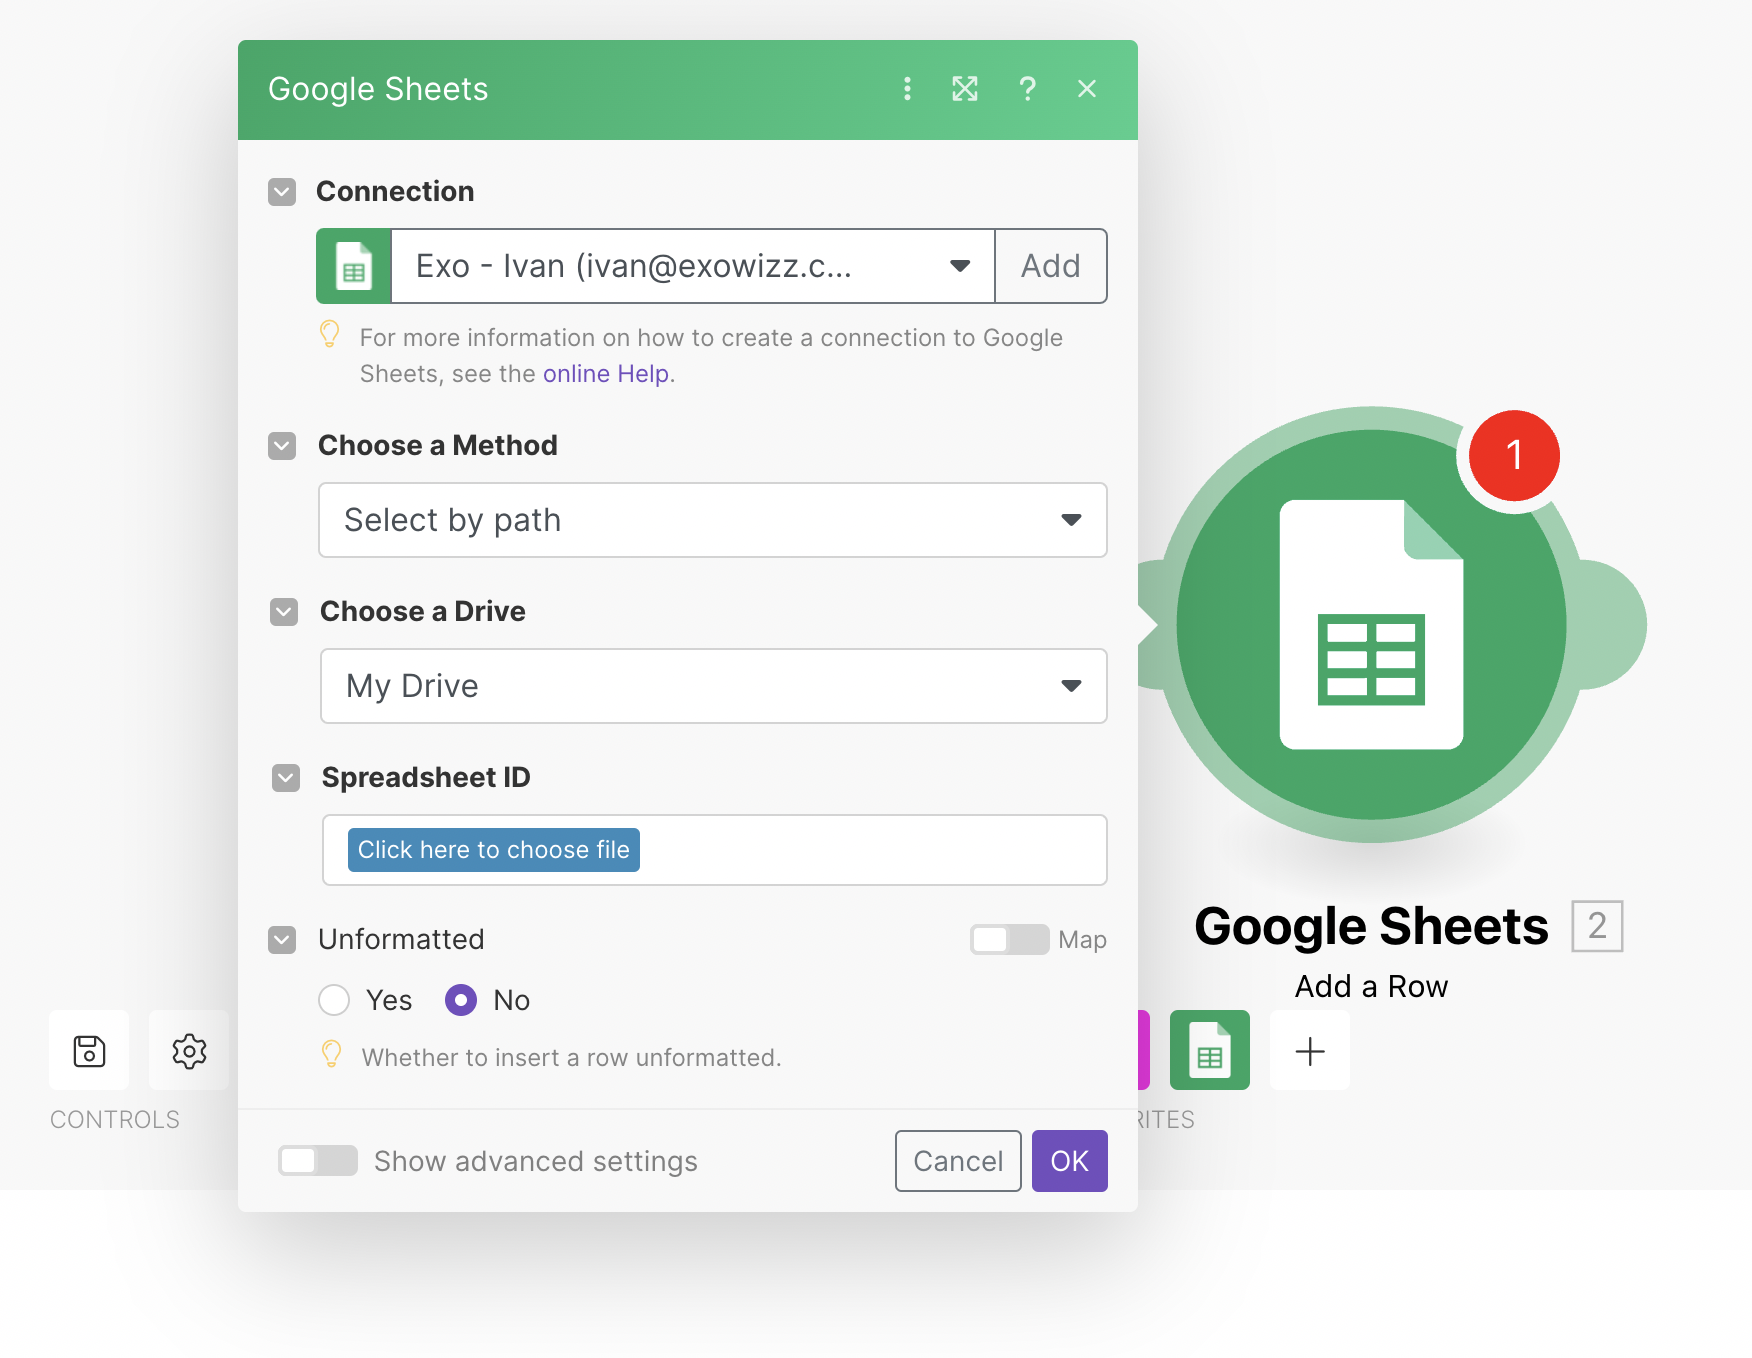
From this modal above, you can see that the first option is connection. I already have one, and I’ll use it.
The second input is to Choose a Method – Select by path is ok.
Now based on that, where your Google sheet is saved, you need to select it. In my case, it’s in a Shared drive.

After selecting Spreadsheet ID, it’s time to choose a Sheet Name and map data properties.
Since I already run the Tally module, Make.com knows what data to expect to easily map data from the first module into the Google Sheets module.
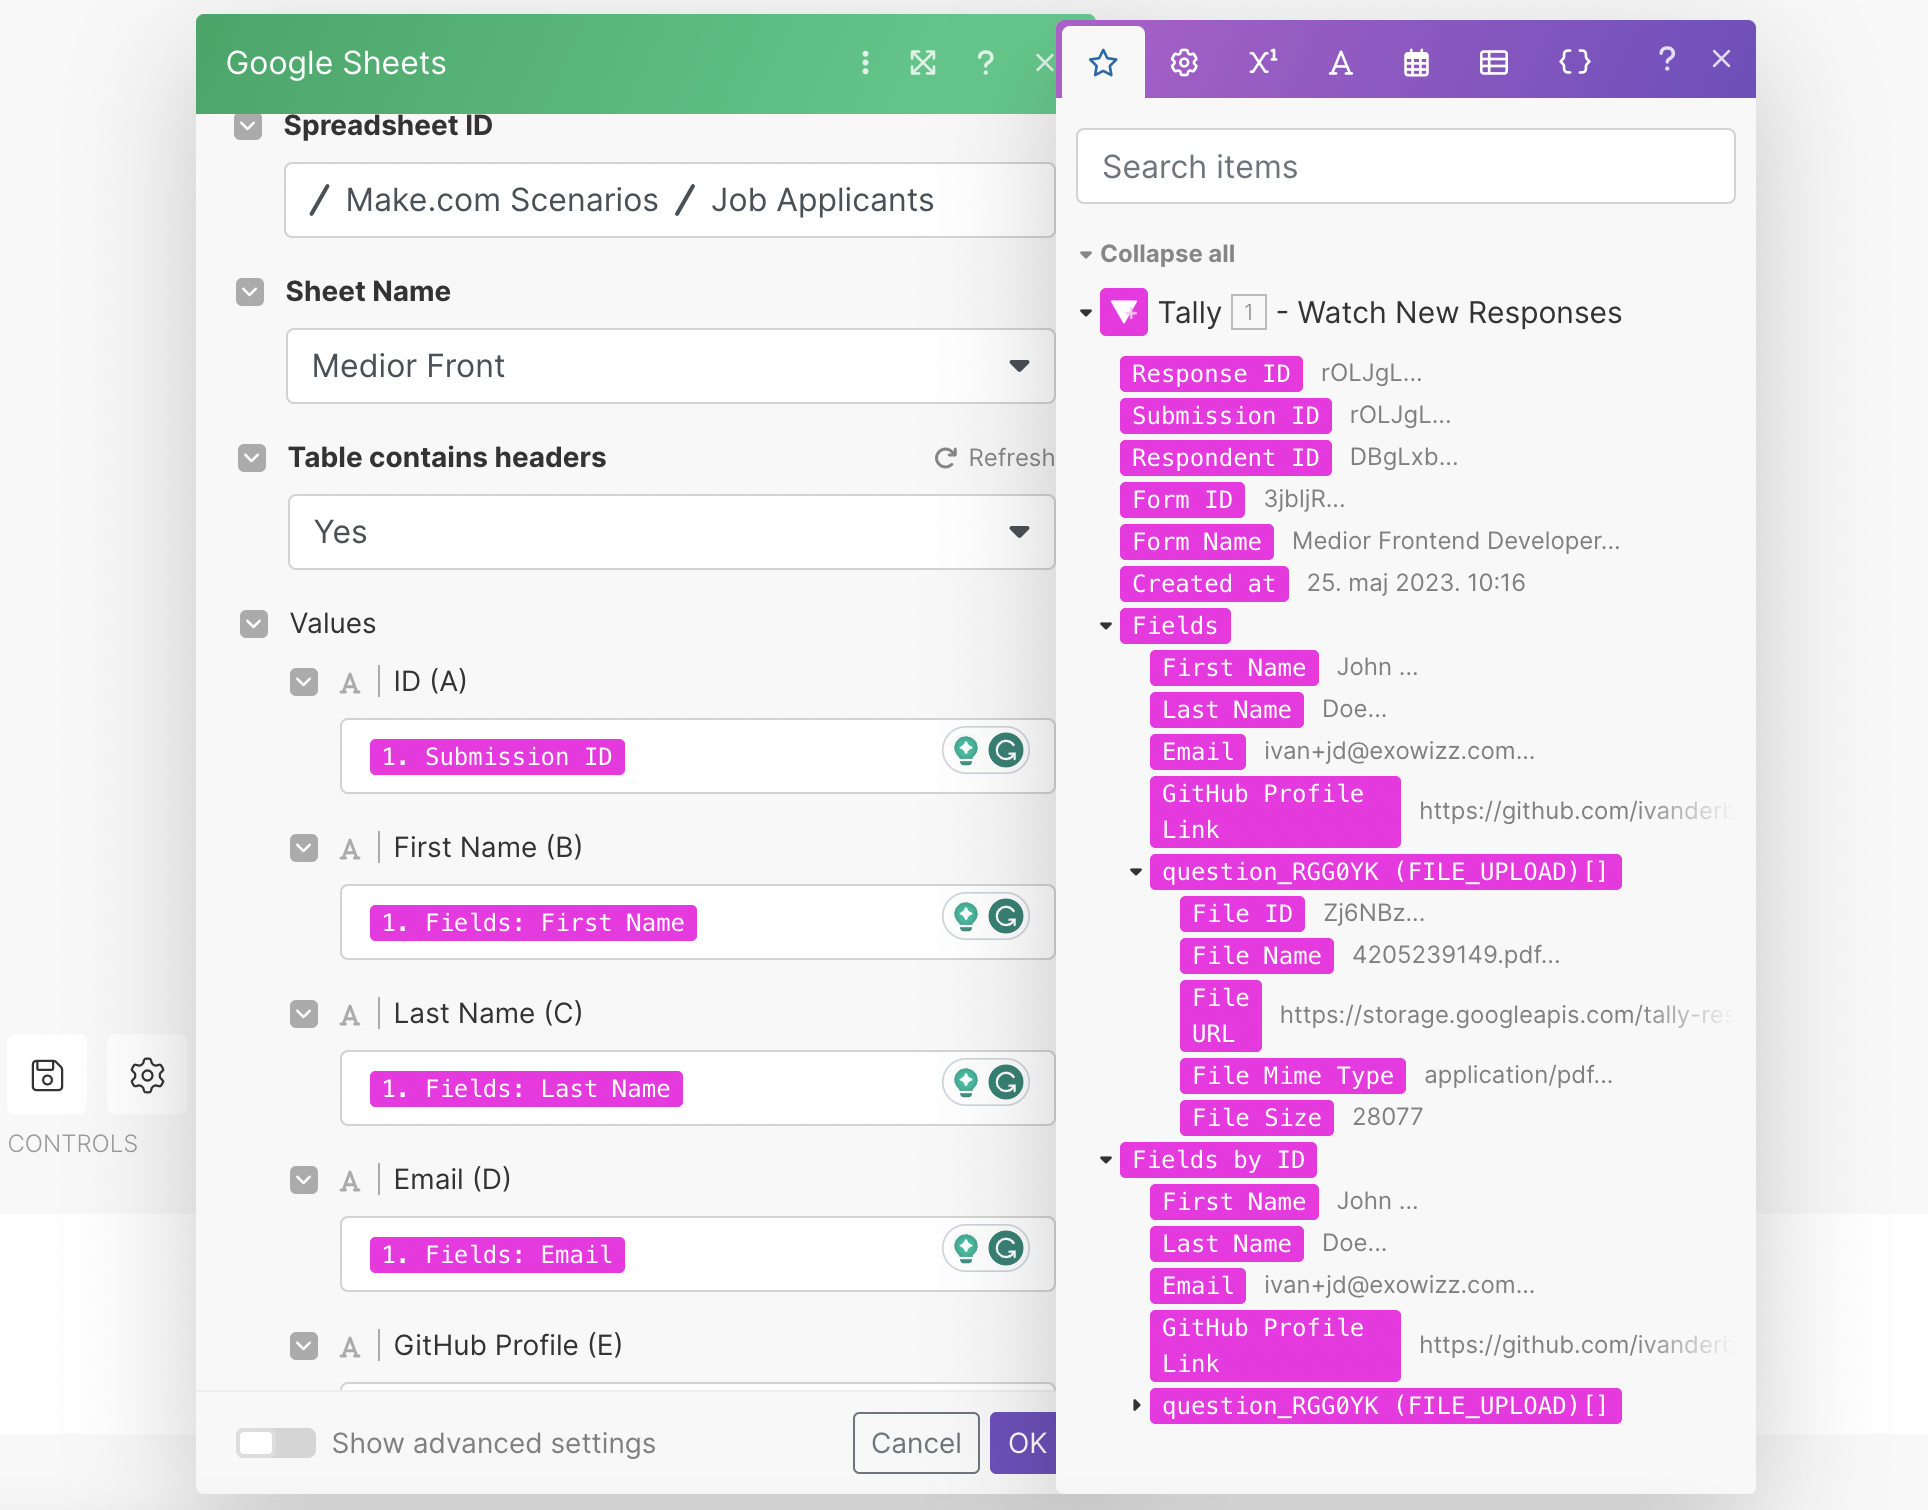
I’ve mapped all these properties. When I save this module and the entire scenario, I can click Run once again.
When I fill out the Tally form, Make.com will create a new row in my table.
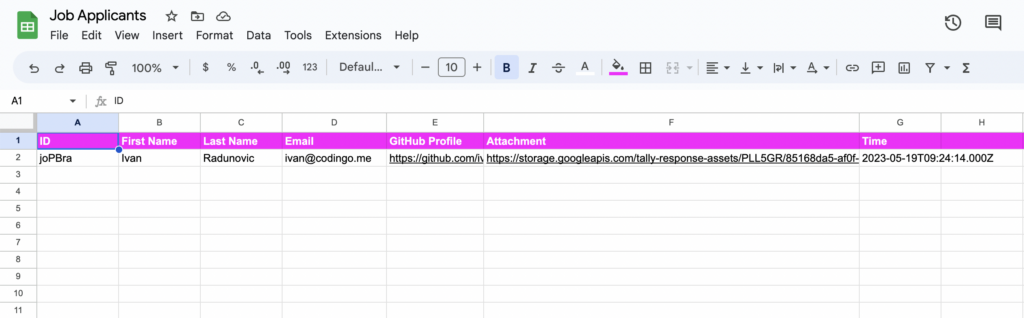
This seems fine.
Now I’ll notify my team through the Slack channel when we have a new submission.
Slack notification
Next to the Google Sheets module, I’ll add a new Slack module – Add a message module.
When adding a new application into the scenario, logic is always the same; you must create a new connection or use an existing one.
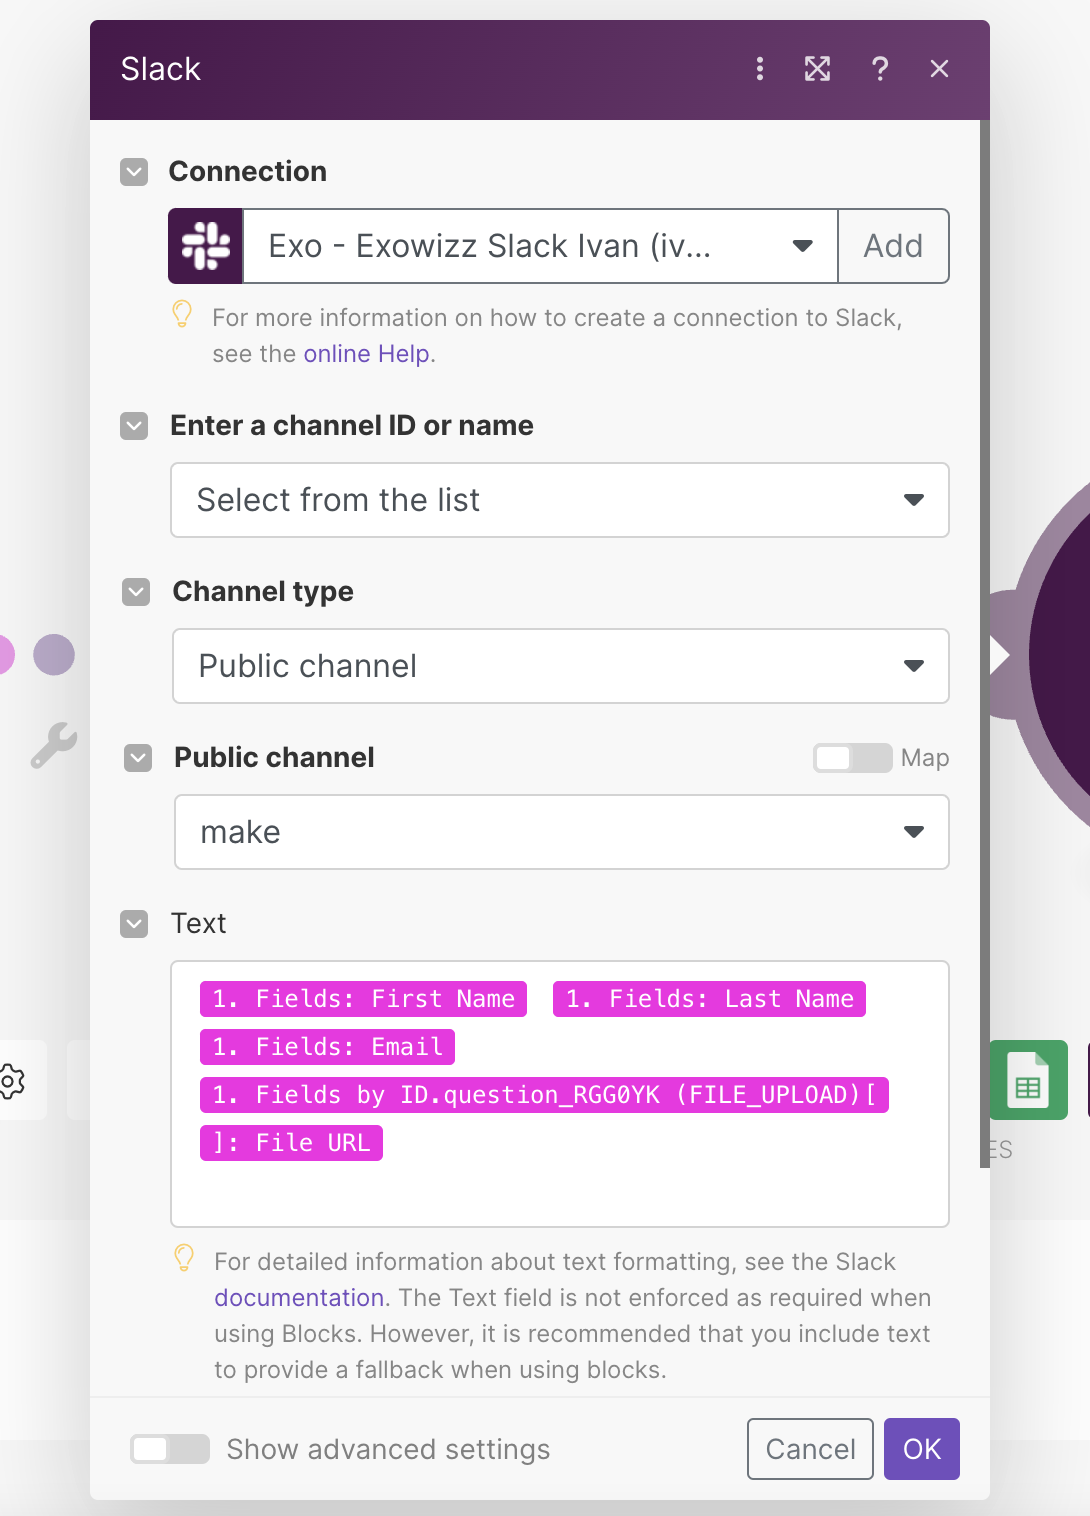
Here I did not use any formatting or Slack blocks, but you have all the options of Slack available when mapping the data.
Now after every form submission Make will first add a new row to the Google Sheets and after that it’ll post to #make channel of my Slack workspace.
This is the basic example of a no-code job application scenario. You can expand this scenario in several ways. One option would be to loop through Tally attachments and upload them into some Google Drive folder. Or to create Trello tickets with every applicant and so on.
Save and Activate the no-code job application scenario
If you’re happy with how the scenario works, you can save it and turn it ON.
Since we use an instant trigger, every form submission will activate our scenario. Every entire run of the scenario will use 3 operations.
Advantages of using Scenario Builder
As you saw, adding new modules and expanding logic is very easy. Anyone can work on scenarios, and no coding is required.
The best option is that processes can be easily changed in a timely manner. HR processes are constantly changing, so it’s important to have a flexible solution.
In Make, you can clone a scenario with 1-click and work on a new version. I’ll show this and much more in the following days.
